About a year ago I wrote a post about a need for a good keyboard. And that I am thinking of making mechanical one.
During last week I built one.
Repetitive strain injury
Twenty years ago I had a problem with repetitive strain injury (RSI in short). Typing on normal PC keyboard was quite impossible for me. Someone recommended buying one of those “fancy” ergonomic ones. And that’s how I ended with Microsoft Natural Keyboard Elite.
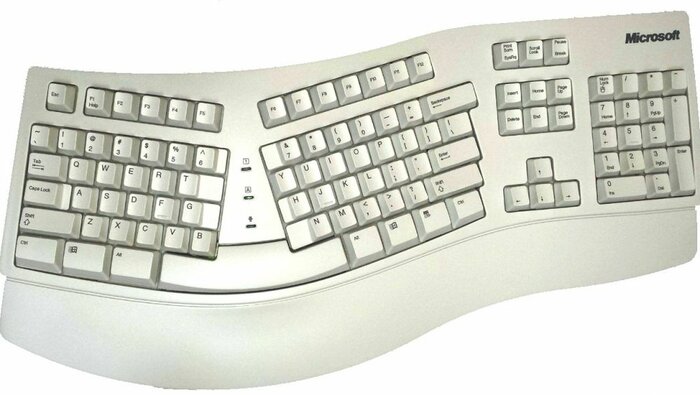
It was a great help. Got used to layout and my RSI problems were going away. Then bought second one to have one at home and one at work.
Time passed, keycaps were worn up so I got another keyboard — you can read the story in last year post about keyboards.
Let’s get mechanical
During last year I looked at several keyboards. Checked KMK, QMK, ZMK and other solutions of keyboard firmware. Watched countless videos on how to make keyboard and read many articles about it.
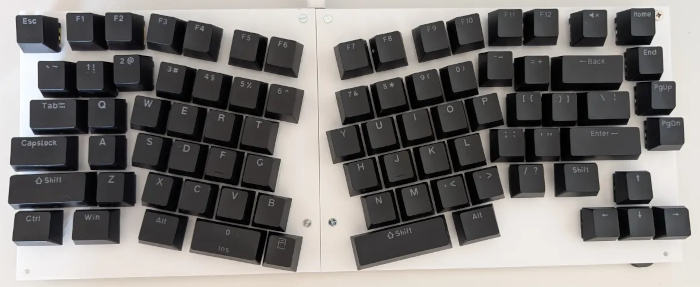
One layout caught my eye: TGR Alice as it was quite simple ergonomic one. Then found Arisu which added cursor keys and did some other changes. And finally Adelheid which added function keys.
My Adelheid
As those layouts are available on MIT license I took Adelheid and altered its layout a bit:
- added Meta key
- moved Backspace to where it is on PC105
- moved Backslash to above Enter key
Parts and costs
I had some parts already (ordered then to my MS4KMech project which I abandoned in meantime) and decided that my first keyboard will be as cheap as possible:
- Redragon switches (11€ on Aliexpress)
- cheap ABS keycaps (5€ on Aliexpress)
- Ultimate Pico RP2040 (2.7€ on Aliexpress)
- hundred 1N4148 diodes (2€)
So the cost of parts was about 20 EUR.
As a way to keep costs down I printed plate in two pieces (Ender 3 table size was a limit) and used some screws and plates to keep them together.
Soldering rows and columns
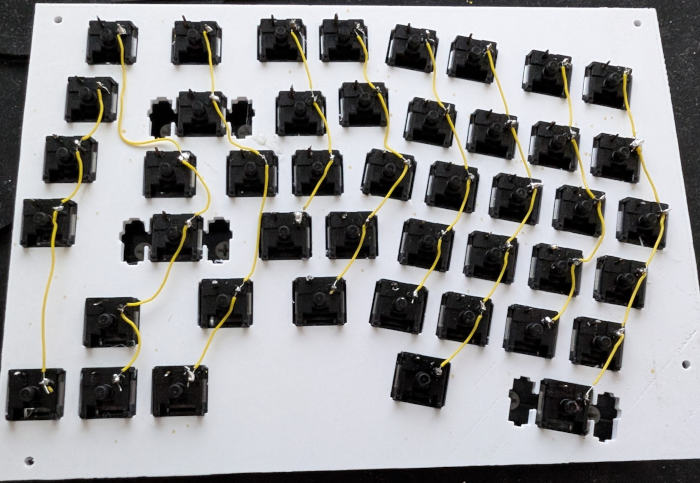
Mounted switches and started soldering. Simple diode to diode to create rows. And it is visible that I watched some video after first 3 rows of one half ;D
Instead of forming diodes I soldered them and then use small pliers to form rows. Later started cutting legs before soldering.
Columns were easier. Spool of kynar and stripping isolation using nails did the job.
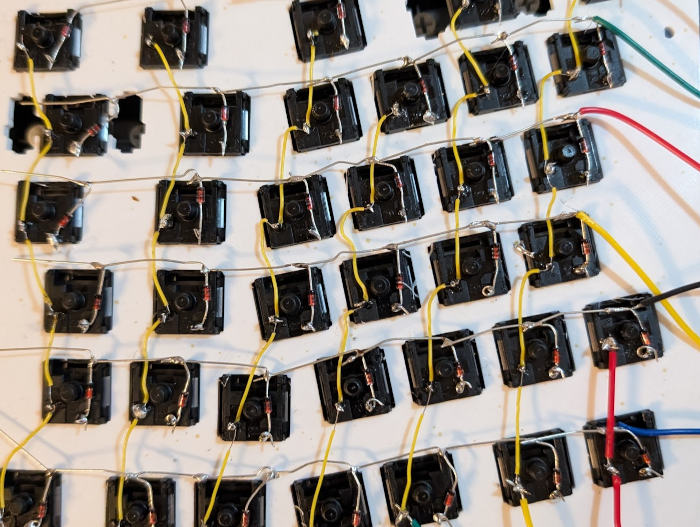
Added a bunch of colour wires to be able to test if my soldering resulted in something working. Grabbed Raspberry Pico from a drawer, flashed it with QMK firmware and testing bench was ready:
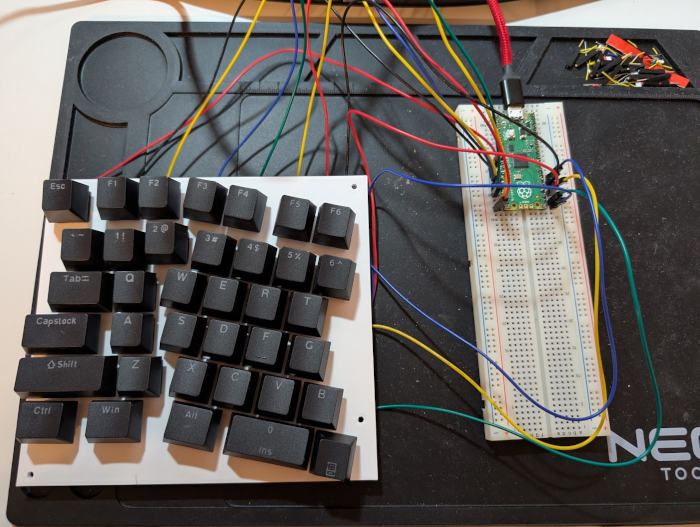
And it almost worked! One key was not working. Turned out that diode was soldered in wrong direction. Happens.
For second half I took a bit different strategy. Decided to solder columns first as they took me more time than rows. Whole half went much faster then first.
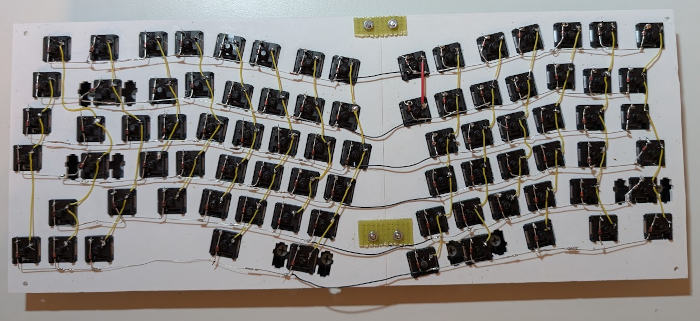
Then all that left was finding a way to connect both halves (I did not want to make a split keyboard) and connect rows. I used pieces of old universal PCB and screws:
Connecting controller
I bought Ultimate Pico RP2040 especially for keyboard project months ago. Compared to Raspberry Pico this board had USB-C port and one line more (GP29). Also less GND pins so 17 GPIO lines are on one side. My keyboard has 16 columns so this allowed me to have all columns connected on one side of board and use second side connections for rows:
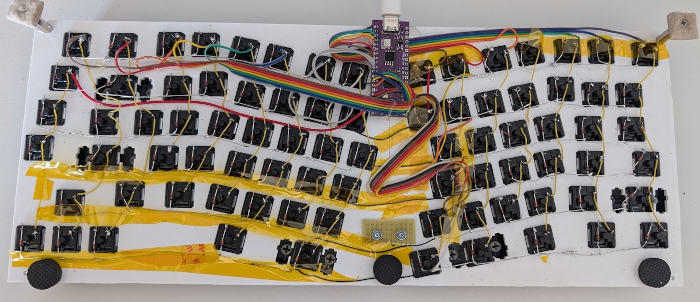
It may not look nice but it works :D
Powering up
I flashed QMK and started testing. Turned out that one column is not working. Soldered wire and it was fine.
3 other keys were not working. One needed soldering but other ones looked fine.
QMK has a solution for it: “Console debugging”. I added a bit of code to
keymap.c file:
bool process_record_user(uint16_t keycode, keyrecord_t *record) {
  // If console is enabled, it will print the matrix position and status
  // of each key pressed
#ifdef CONSOLE_ENABLE
    uprintf("KL: kc: 0x%04X, row: %2u, col: %2u, pressed: %u, "
            "time: %5u, int: %u, count: %u\n",
            keycode, record->event.key.col, record->event.key.row,
            record->event.pressed, record->event.time, record->tap.interrupted,
            record->tap.count);
#endif
  return true;
}
This allowed me to notice that both Enter and End keys are seen. Turned out that I had entered the wrong row/column values for both of them.
Mistakes
I made some mistakes with this keyboard. They were expected as usual with first attempts.
First mistake: 2mm plate. I should have made it 1.5mm to make switches keep better. Total thickness can be even 3-5 mm but with holes done in a way that switches hold properly. Also it may make keyboard less bendy.
Second mistake: holes for stabilisers. I have a few 2u - 2.75u keys and they should get stabilisers. But I did holes in wrong way so the ones I have do not fit. Will see how it affects keyboard use.
Third one: soldering. I do not remember when last time I soldered so many points. So some of other are shitty. Just had to fix one more…
Tools
Community behind mechanical keyboards created many tools. Let me try to list ones I used.
First comes QMK firmware which allows to forget about programming microcontrollers as keyboard is done as simple JSON file and one C file with keymap definition.
Then Keyboard Layout Editor which allows to define layout of keys in any crazy way you want. Raw data from it is a base for several other tools.
Keyboard Firmware Builder is a simplest way to manage wiring of keyboard. You paste raw data from previous tool and start simplifying wiring. It can also generate ready to use QMK firmware images for several popular micro controllers (but no RP2040 I used).
Plate & Case Builder also takes layout data. And allows to choose switch/stabilizer types plus a bunch of other options. Then generates plate for your layout with option to download it in SVG, DXF, EPS file formats. I took SVG, extruded to 2mm and had a base plate for 3d printing.
Was it worth the time?
The question for the end: was it worth the time? I think that it was. Learnt new things, got something working. Something I did on my own. Sure, it is far from being perfect but gives me area for improvements.
I have two space keys and already see that for most of time I use right one. There are no layers defined yet and I have a key for it. Some keycaps may get replaced with other ones (like Calculator one next to left Space begs for lower one).
I have links to many interesting layouts so who knows, maybe I will make a new keyboard soon. Split, orthogonal one. With volume knob. Will see.
Further changes
During months after publishing this post I did several changes to the keyboard. Some were hardware related, some were in firmware, and some were keymap ones.
Encoders
At some point I added two encoders: the top encoder is media control. Volume Up/Down/Mute by default. Media Next/Prev/PlayPause with Fn.
Bottom one is for scrolling. Mouse wheel by default as it scrolls by lines. Page Up/Down with Fn.
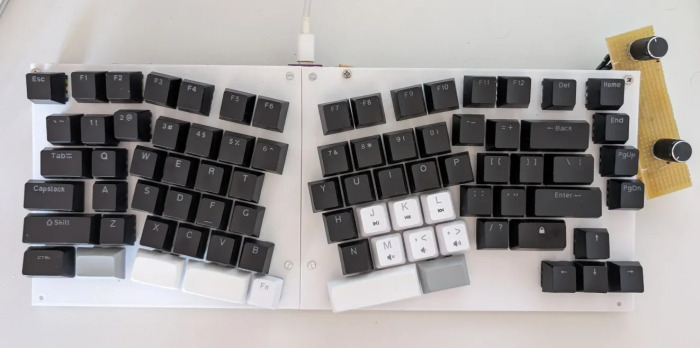
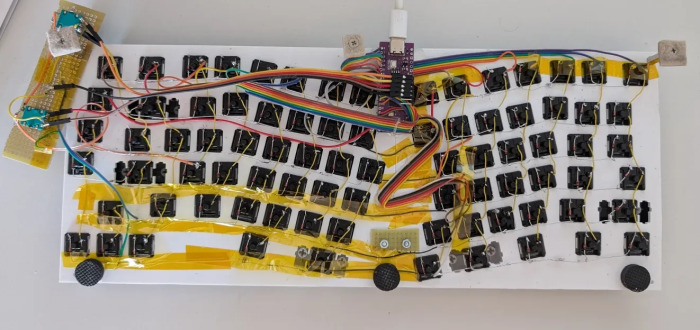
Those photos also show how mixed keycaps I used. The “JKLM,.” ones were from one of cheap keyboards I bought for parts. I used them to help me memorise media related shortcuts (available with Fn key).
USB hub
Another upgrade was adding USB hub so I could have my Yubikeys always within reach.
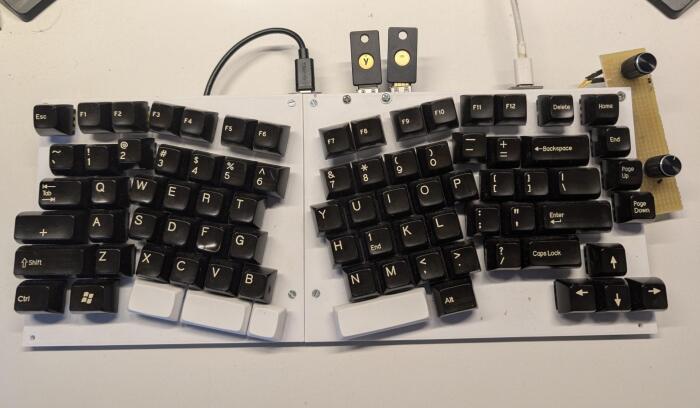
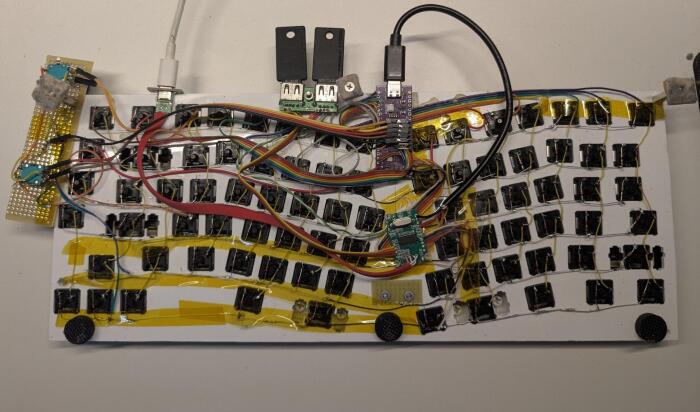
The DSA style keycaps I got during Mechanicon 2025 event. Adding hub complicated cable mess even more. Especially with this cable powering UltimatePico ;D
Case
As I bought 3D printer I decided to put this keyboard inside some kind of a case.
Turned out that this was a very bad idea. I had to move the UltimatePico board which broke some wiring. Soldering fixed some issues, screwing keyboard into the case brought another set of problems.
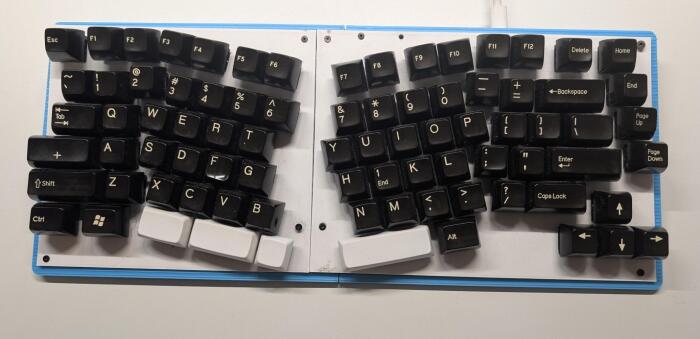
I killed it.
Over year of use: Summary
Alicja v1 was a very good keyboard. Allowed me to learn how mechanical keyboards are built, what can be done with QMK/VIA/VIAL firmwares. How to configure it, where to move some keys etc.
Compared to Adelheid I added left Meta key and then did not used it. Instead I assigned that keycode to 1u key next to the left space. It is more comfortable to use left thumb to press Meta than to squeezing it to be able to reach key in its ‘standard’ place.
Having Fn key in place of CapsLock one feels so natural. I never got used to CapsLock — for quite a while it was mapped to either Control or Compose and even then I did not use that key. Now it has some good use.
Second version of Alicja got right Control key as it was missing several times. And Insert key.
I also removed second encoder as it was rarely used — I have Page Up/Down keys in the thumb cluster on my mouse.